Managing your inbox efficiently is key to staying productive. One of the most powerful tools in Microsoft Outlook is the Rules feature, which allows you to automate email organisation based on specific criteria. Whether you’re filtering newsletters, flagging important messages, or moving emails to folders, setting up rules can save you time and reduce clutter.
Rules can manage a huge list of automated tasks, to name a few:
- Move emails from a specific sender to a designated folder
- Flag messages that contain keywords
- Mark newsletters as read
- Automatically forward emails from a specific address to another member of your team
- Route internal emails to a separate “internal comms” folder.
- Archive old emails from a specific date range
And much, much more! Rules are a powerful feature of Outlook that is often undervalued.
Here’s a simple guide to help you get started.
Step 1: Access the Rules Menu
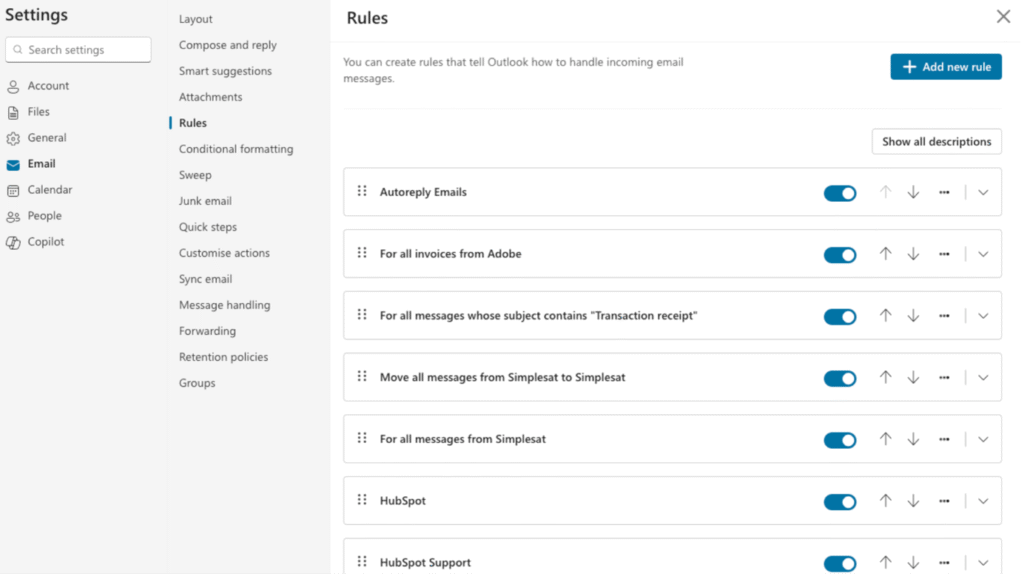
To begin, open Outlook and access the rules menu. On the old version of outlook for Windows, you’ll find it inside of the File > Rules menu.
On the new version of Outlook or the web version it’s in the Settings Cog (top right) > Emails > Rules
On Outlook for Mac, you can find it inside of Tools > Rules, Microsoft love to change the positioning of features so for the most up to date information, visit our client portal and view the courses.

Step 2: Create the New Rule
In the Rules window:
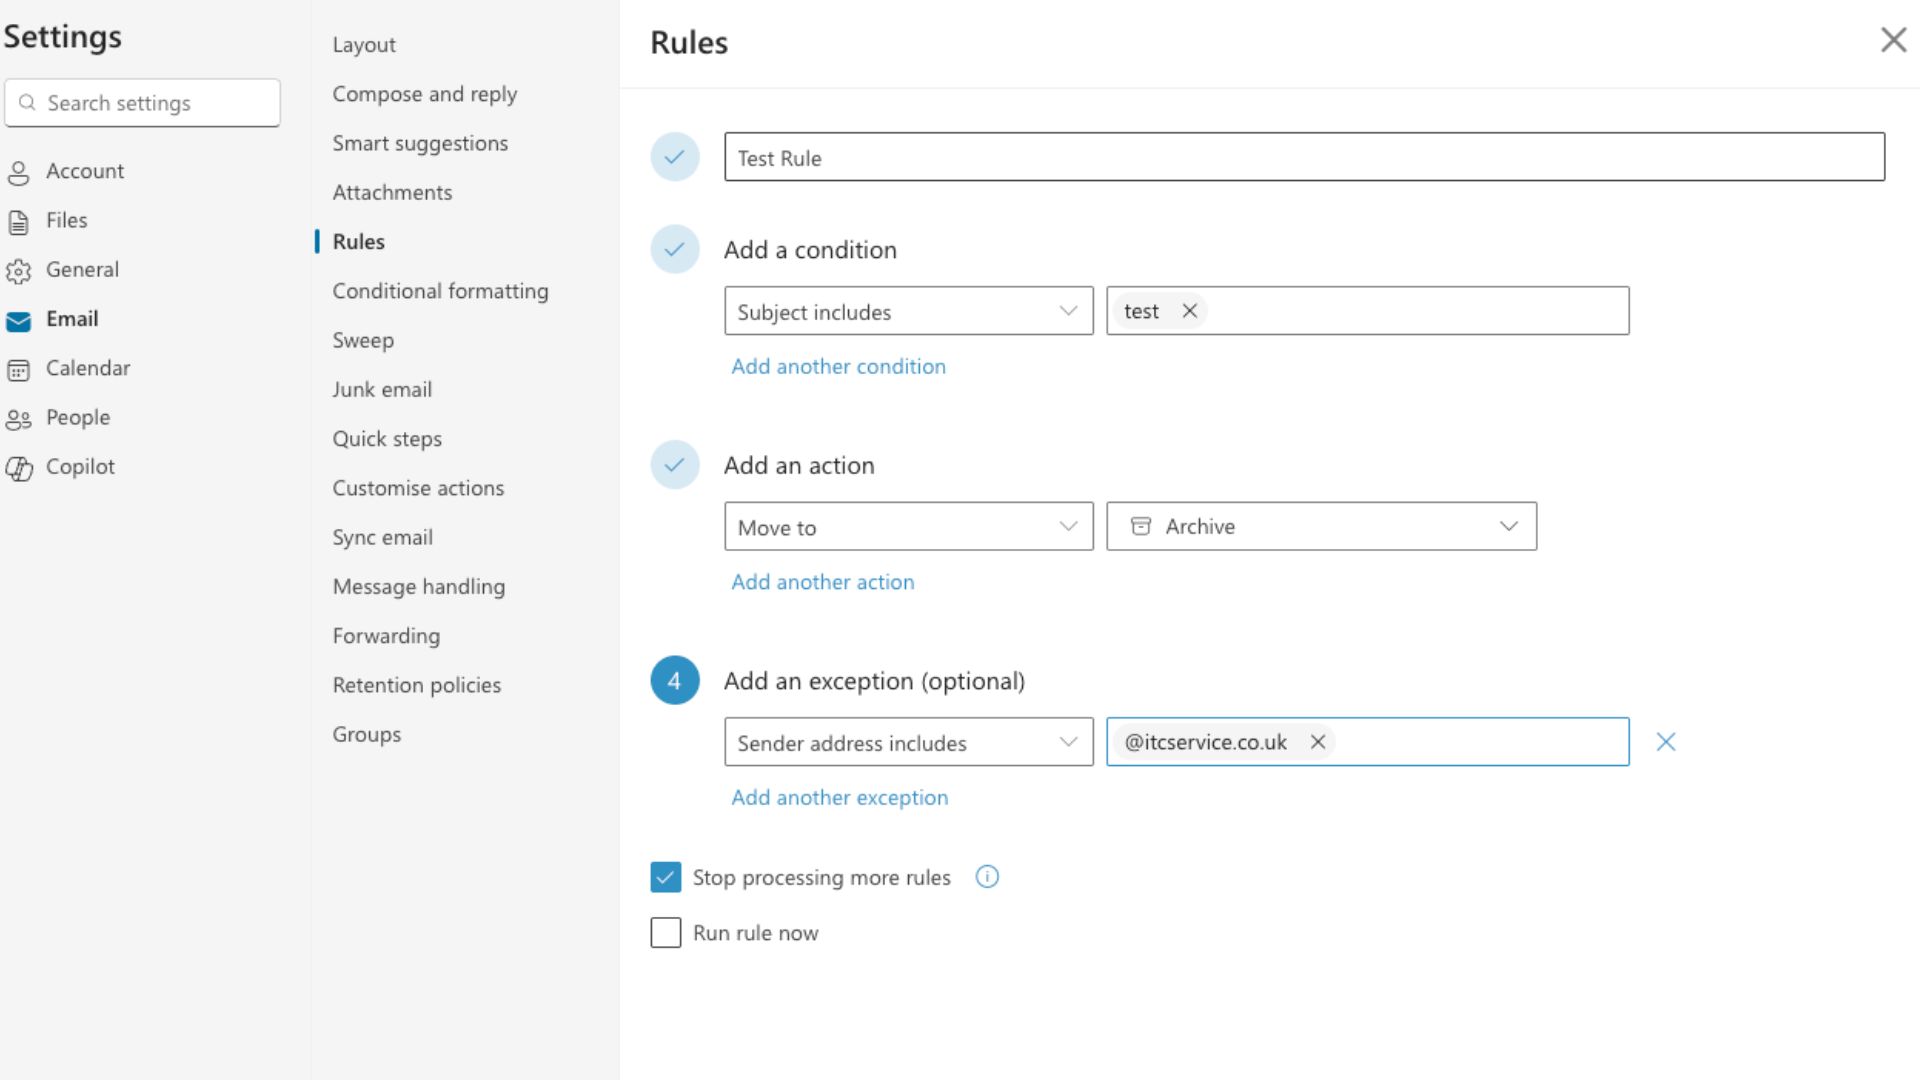
- Click New Rule.
- Add a condition: (for example, if subject includes Test)
- Add an action: (for example, move to Folder). You can add multiple actions, for example, move to a folder and alert you.
- You can also add exceptions, for example. We might want to send all emails with the subject line test to the bin, unless the sender is someone within your organisation
We recommend taking the time to learn about the possibilities of rules, just be very careful about accidental data deletion, and always ensure your Microsoft 365 account is backed up regularly so that in the instance of a disaster, you’re covered! If you have any hesitations about this, reach out to our team here.

Step 3: Name and Finish Your Rule
- Give your rule a clear name that you’ll understand and remember
- Choose whether to run the rule on existing messages by selecting Run rule now.
- You also have the option to stop processing more rules, this will stop any additional rules from actioning on this email.
- Click Save
Tips for Effective Rule Management
- Keep it simple: Start with one or two rules and build from there.
- Review regularly: As your workflow changes, update or remove outdated rules.
- Use folders wisely: Create folders that reflect your priorities and projects.
Alternative Method of Creating Outlook Rules Quickly
You can also create rules directly from the message on which you would like the rule to act upon. For example, if you notice a lot of emails from a specific company, and you’d like to create a rule to sort those into a folder. Here is a quick way to do exactly that:
- Right click on the email and hover over Rules
- Here you will see a number of quick options depending on the content of the email, for example, move messages from sender to folder
- If none of the quick options match your use case, go to create rule. You’ll be greeted with a familiar screen from method one, but it will prepopulate fields like sender, domain, subject line to make selection easy and accurate.
Need Help?
If you run into any issues or want to explore advanced rule options, feel free to reach out to our IT support team or check Microsoft’s official documentation.
For additional knowledgebase articles, review our Client Portal, a comprehensive IT Support management tool that helps you get the most from your technology.


